There are several reasons why you might need to style a Gutenberg page with CSS in Bricks Builder. You might want your customer to create and edit pages in WordPress’ Page Editor (Gutenberg). Perhaps your customer might prefer the WordPress Page Editor. Now that you’ve created the “theme” sections of a website with Bricks Builder, the problem is how to style the content written inside of the WordPress Page Editor from within Bricks.
How to Select Page Editor Content with CSS in Bricks
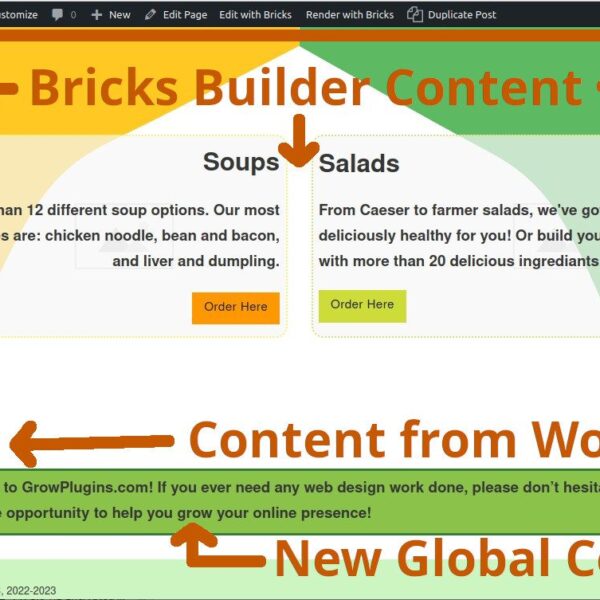
WordPress page content is usually displayed inside of an <article> HTML tag, while Bricks builder page content uses the HTML elements you choose in the Bricks page editor. This means that adding a section element in Bricks adds a <section> HTML element to the front end of the page. If you target the <article> element in CSS, you should, in most cases, only affect pages that are generated by WordPress, and not by Bricks Builder itself. Below is an example to get you going.
body article {
    margin-top: 5em;
}
How to Add CSS to Page Content in Bricks Builder
Now there is the problem of getting this CSS code onto the pages where the WordPress Page Builder is used. Here are a few different options.
Option 1: Add Global CSS to the Bricks Builder Settings Page

In the admin menu, go to Bricks > Settings. In the Bricks Settings page, go to the Custom Code tab. Enter any CSS you want to show up globally into the Custom CSS field, and click Save Settings. This option will output your CSS code on every single page of your website. This is not ideal, but it may be necessary.
Option 2: Add CSS to a Template That Shows up on Every WordPress Page

In the admin menu, go to Bricks > Templates. Find a template you have that shows up on every WordPress page you need your CSS to affect. Click Edit with Bricks. In the top left-hand-side of the Bricks editor, click the gear icon. Select Page Settings, and then Custom Code. Any CSS you enter in the Custom CSS field will be output onto every page that the template shows up on. This option sounds better than using the global CSS option, but in reality you will probably not have a template that only shows up on WordPress pages. I have used this with the header template, but this is the same thing as using the global CSS option, isn’t it?
Option 3: Add CSS to Each Individual Page You Need it On

It turns out that you can edit a Page Editor page in Bricks Builder, and as long as you only edit the page’s Page Settings and don’t have any Brick Builder page content on the page, saving this won’t render the page with Bricks Builder content. Add any Custom CSS here for a specific Gutenberg page you want it to affect. In Bricks Builder, go to the gear icon in the upper-left-hand side of the screen, then click Page Settings, and Custom Code. Please be aware, however, that this solution probably won’t work if you have either of the “Load Gutenberg data into Bricks” or “Save Bricks data as Gutenberg data” options turned on in Bricks Builder.
Hopefully one day Bricks Builder will have a full-fledged permission system for managing who can do what with the Bricks editor, and also a more robust way to manage the way Gutenberg-generated pages look. Until then, hopefully this article helps you along on your web design journey with Bricks!
This post was inspired by this conversation on the Bricks Builder forums.